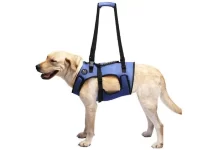
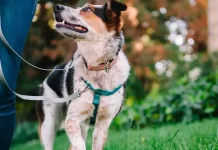
Imagine having a fun and stress-free walk with your furry friend, without the constant tugging and pulling. Guess what? You can! In this article, we will explore whether it is possible to make your own no-pull dog harness right in the comfort of your home. With some simple materials and a little creativity, you might just find yourself on the path to a more pleasant walking experience for both you and your four-legged companion. So, grab your crafting tools and let’s get started on this exciting adventure!
Materials needed
Before you begin making your own no-pull dog harness at home, it’s important to gather all the necessary materials. Here’s a list of items you will need:
- Nylon webbing: Choose a strong and durable material that is about 1 inch wide.
- Buckles and sliders: Look for plastic or metal buckles and sliders that are safe and secure.
- D-rings: These will be used to attach the leash to the harness.
- Sewing machine and thread: A sturdy sewing machine and thread that matches the color of the nylon webbing.
- Measuring tape: This will help you accurately measure your dog’s dimensions.
- Scissors: Sharp scissors are essential for cutting the materials.
- Pins: These will help you keep the fabric in place while sewing.
- Velcro: Optional, but can be used for additional adjustability.
Once you have gathered all these materials, you are ready to start making your own no-pull dog harness.
Choosing the right design
When it comes to choosing the right design for your homemade no-pull dog harness, there are a few factors to consider. These factors include your dog’s measurements, researching different harness designs, and considering your dog’s specific needs.
Taking your dog’s measurements
To ensure a proper fit for your homemade no-pull dog harness, it’s important to take accurate measurements of your furry friend. Measure the circumference of your dog’s chest, just behind their front legs. Measure the length from the base of their neck to the middle of their back. These measurements will help you determine the appropriate size for the harness.
Researching different harness designs
There are various designs for no-pull dog harnesses, ranging from front-clip to back-clip styles. Take the time to research and understand the advantages and disadvantages of each design. Consider your dog’s size, breed, and any specific issues they may have, such as pulling or discomfort.
Considering your dog’s specific needs
Every dog is unique, and it’s important to consider their specific needs when choosing a design for the harness. For example, if your dog has a medical condition that affects their neck or back, you may need to opt for a harness that provides extra support in those areas. Additionally, if your dog tends to pull excessively, you may want to choose a design that discourages pulling behavior.
Constructing the harness
Now that you have chosen the right design for your homemade no-pull dog harness, it’s time to start constructing it. Here are the steps involved in creating the harness:
Gathering the necessary materials
Make sure you have all the materials listed earlier before you begin constructing the harness. Having everything laid out and readily accessible will make the process much smoother.
Creating the base of the harness
Start by cutting the nylon webbing to the appropriate length, based on your dog’s measurements. Take the piece of webbing and fold it in half lengthwise, creating a loop at one end. This loop will serve as the base of the harness that goes around your dog’s chest.
Adding the straps and buckles
Next, cut two additional pieces of nylon webbing to create the straps that will go around your dog’s shoulders and attach to the base loop. Attach one end of each strap to the base loop, and secure them with stitching or by using a strong adhesive. Then, add the buckles and sliders to the straps to create the adjustable features of the harness.
Sewing the harness together
Once all the straps and buckles are properly secured, it’s time to sew the harness together. Use a sturdy sewing machine and thread to stitch all the components together, ensuring that everything is tightly secured. Pay close attention to any stress points, such as where the straps meet the base loop, and reinforce them with extra stitches for added durability.
Testing and adjusting the fit
After successfully constructing your homemade no-pull dog harness, it’s important to test the fit and make any necessary adjustments. Here’s what you need to do:
Fitting the harness onto your dog
Carefully place the harness on your dog, ensuring that the base loop goes around their chest and the straps rest comfortably on their shoulders. Make sure the buckles are properly fastened and adjusted to create a snug but not restrictive fit. Allow your dog to move around freely while wearing the harness to ensure they are comfortable and can walk without any restrictions.
Ensuring the harness is secure and comfortable
Observe your dog’s behavior while they wear the harness. Pay attention to any signs of discomfort, such as rubbing or chafing. If necessary, reposition the straps or adjust the buckles to create a better fit. It’s important to ensure that the harness is secure enough to prevent your dog from slipping out, but not so tight that it causes discomfort or restricts their movement.
Making adjustments as needed
It’s common for some adjustments to be needed during the testing phase. Your dog’s comfort and safety should be the priority, so don’t hesitate to make any necessary changes. Use the measuring tape again if needed to ensure the harness is the correct size and make any modifications accordingly. Remember, a well-fitted harness will be more effective at preventing pulling and providing a comfortable experience for your furry friend.
Safety precautions
While making your own no-pull dog harness can be a rewarding experience, it’s crucial to prioritize safety. Here are some safety precautions to keep in mind:
Checking the harness regularly for wear and tear
Inspect the harness regularly for any signs of wear and tear. Over time, the materials can weaken or become damaged, compromising the harness’s effectiveness. Look for frayed edges, loose stitching, or any other signs of damage. If you notice any issues, it’s important to repair or replace the harness to maintain your dog’s safety.
Ensuring the harness does not restrict movement or breathing
Pay close attention to your dog’s movements while wearing the harness. Ensure that it doesn’t restrict their movement or put pressure on their neck or chest, as this can lead to discomfort or breathing difficulties. Regularly check the fit of the harness to make sure it remains comfortable and allows your dog to move naturally.
Avoiding any choking hazards
Double-check that there are no loose straps or dangling parts on the harness that your dog could accidentally chew on or get caught in. Dogs have a curious nature, and safety hazards should be eliminated to prevent any potential choking incidents.
Alternatives to making your own harness
Making your own no-pull dog harness may not be feasible for everyone. If you’ve decided that creating a homemade harness is not the right option for you, consider these alternatives:
Exploring ready-made no-pull harness options
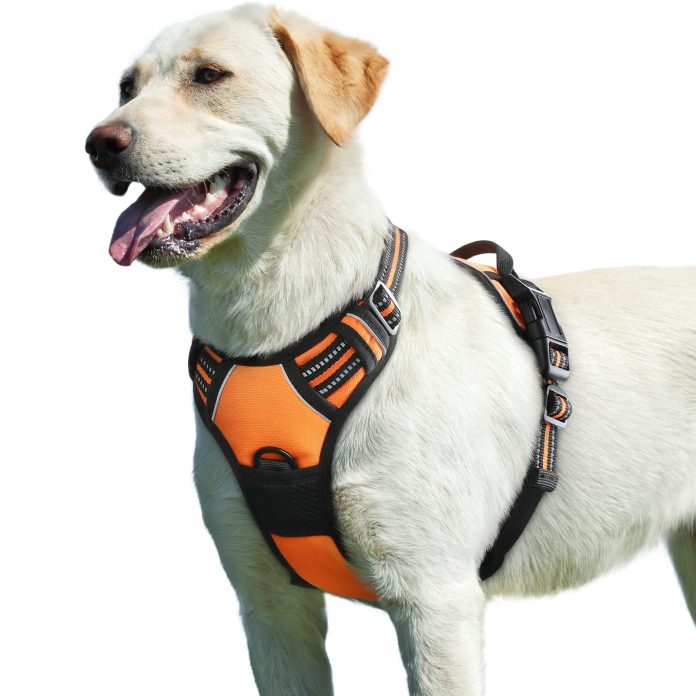
There are many commercially available no-pull dog harnesses on the market. These harnesses have been specifically designed and tested for optimal comfort and effectiveness in preventing pulling. Explore different brands and read reviews to find a harness that suits both your dog’s needs and your preferences.
Consulting a professional dog trainer for guidance
If you’re struggling with your dog’s pulling behavior, it may be beneficial to seek the guidance of a professional dog trainer. They can provide expert advice and recommend training techniques that can help discourage pulling and reinforce positive walking behavior. A trainer can also help assess your dog’s specific needs and recommend a harness or training approach that will be most effective.
Considering other training methods to discourage pulling
In addition to using a harness, there are various training methods that can be employed to discourage pulling. For example, teaching your dog loose-leash walking techniques, using positive reinforcement, and engaging in regular training sessions can all contribute to curbing pulling behavior. Explore different training methods and find the one that works best for you and your dog.
Conclusion
Making your own no-pull dog harness at home can be a rewarding and cost-effective option. By gathering the necessary materials, choosing the right design, constructing the harness, testing and adjusting the fit, and prioritizing safety precautions, you can create a harness that suits your dog’s needs. However, if making your own harness is not feasible for you, there are alternative options available, such as ready-made harnesses and seeking professional guidance. Remember, the goal is to provide your furry friend with a comfortable and effective walking experience while ensuring their safety and well-being.

